Friday, January 31, 2014

Refashion: Part 2 - Dress to Top.

Hello all! Back again with Part 2 of my dress refashion. You may remember from last post that so far from this dress I've gotten a blouse I'm pretty darn happy with:


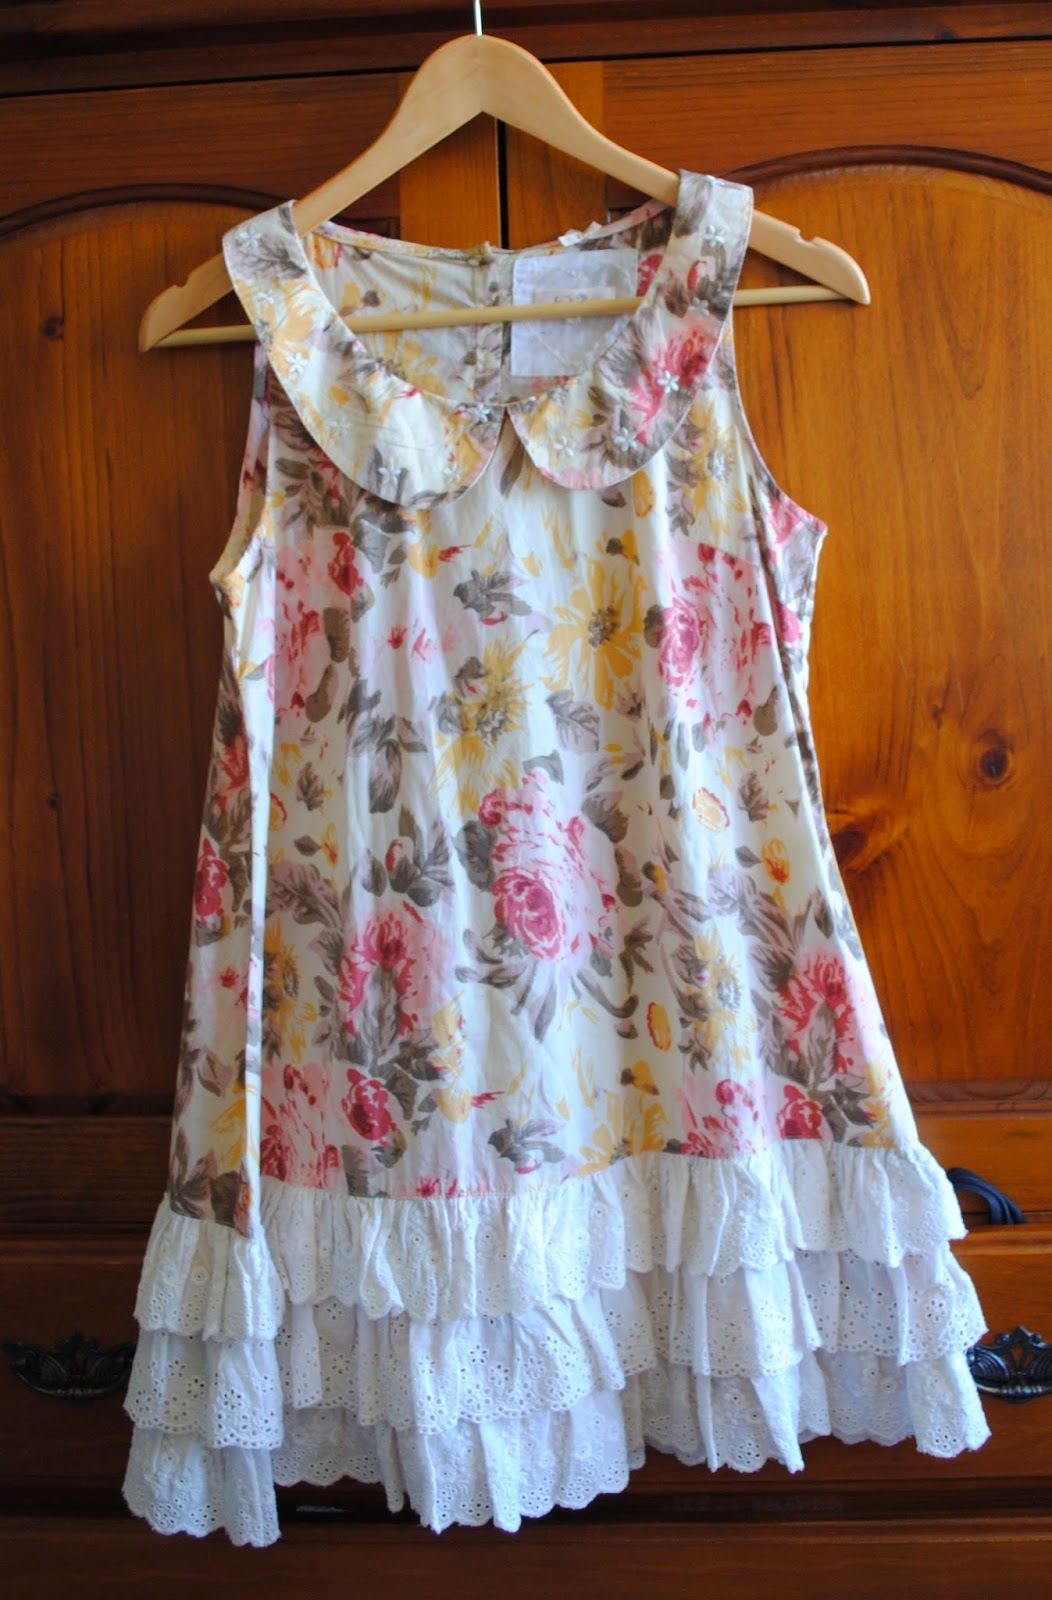
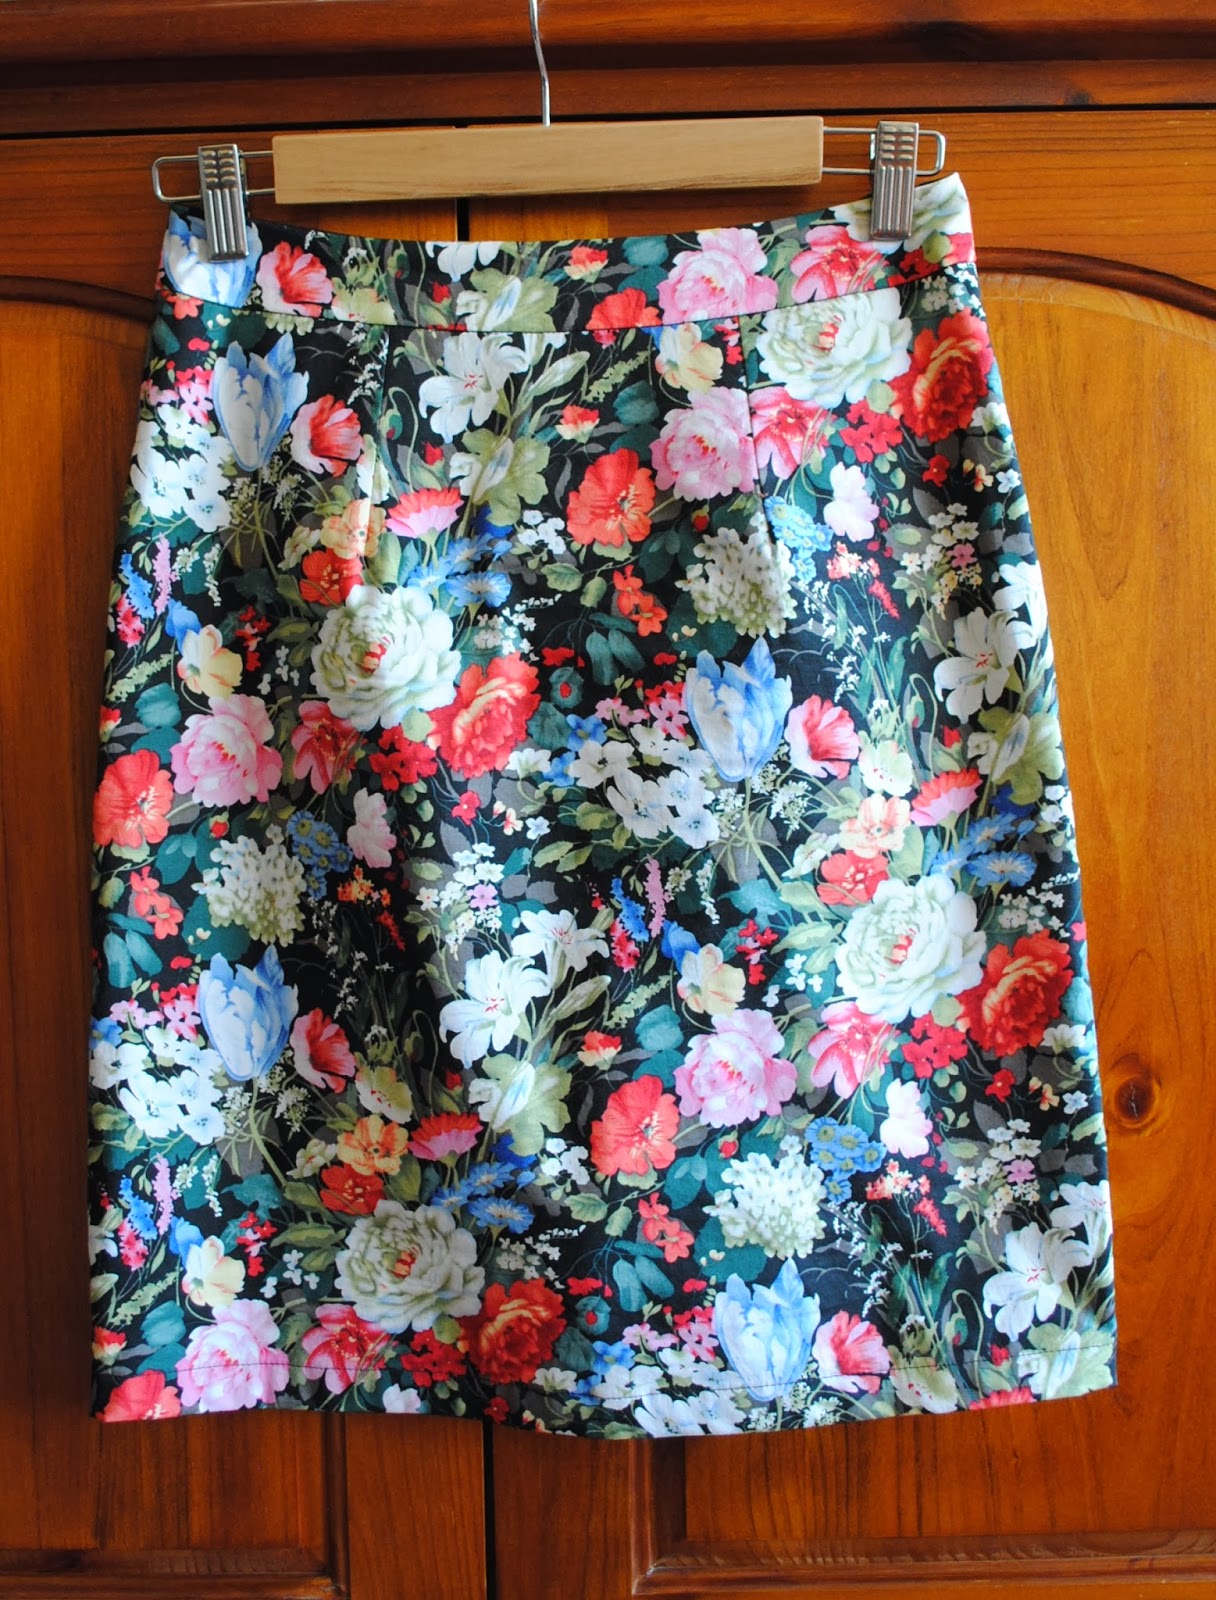
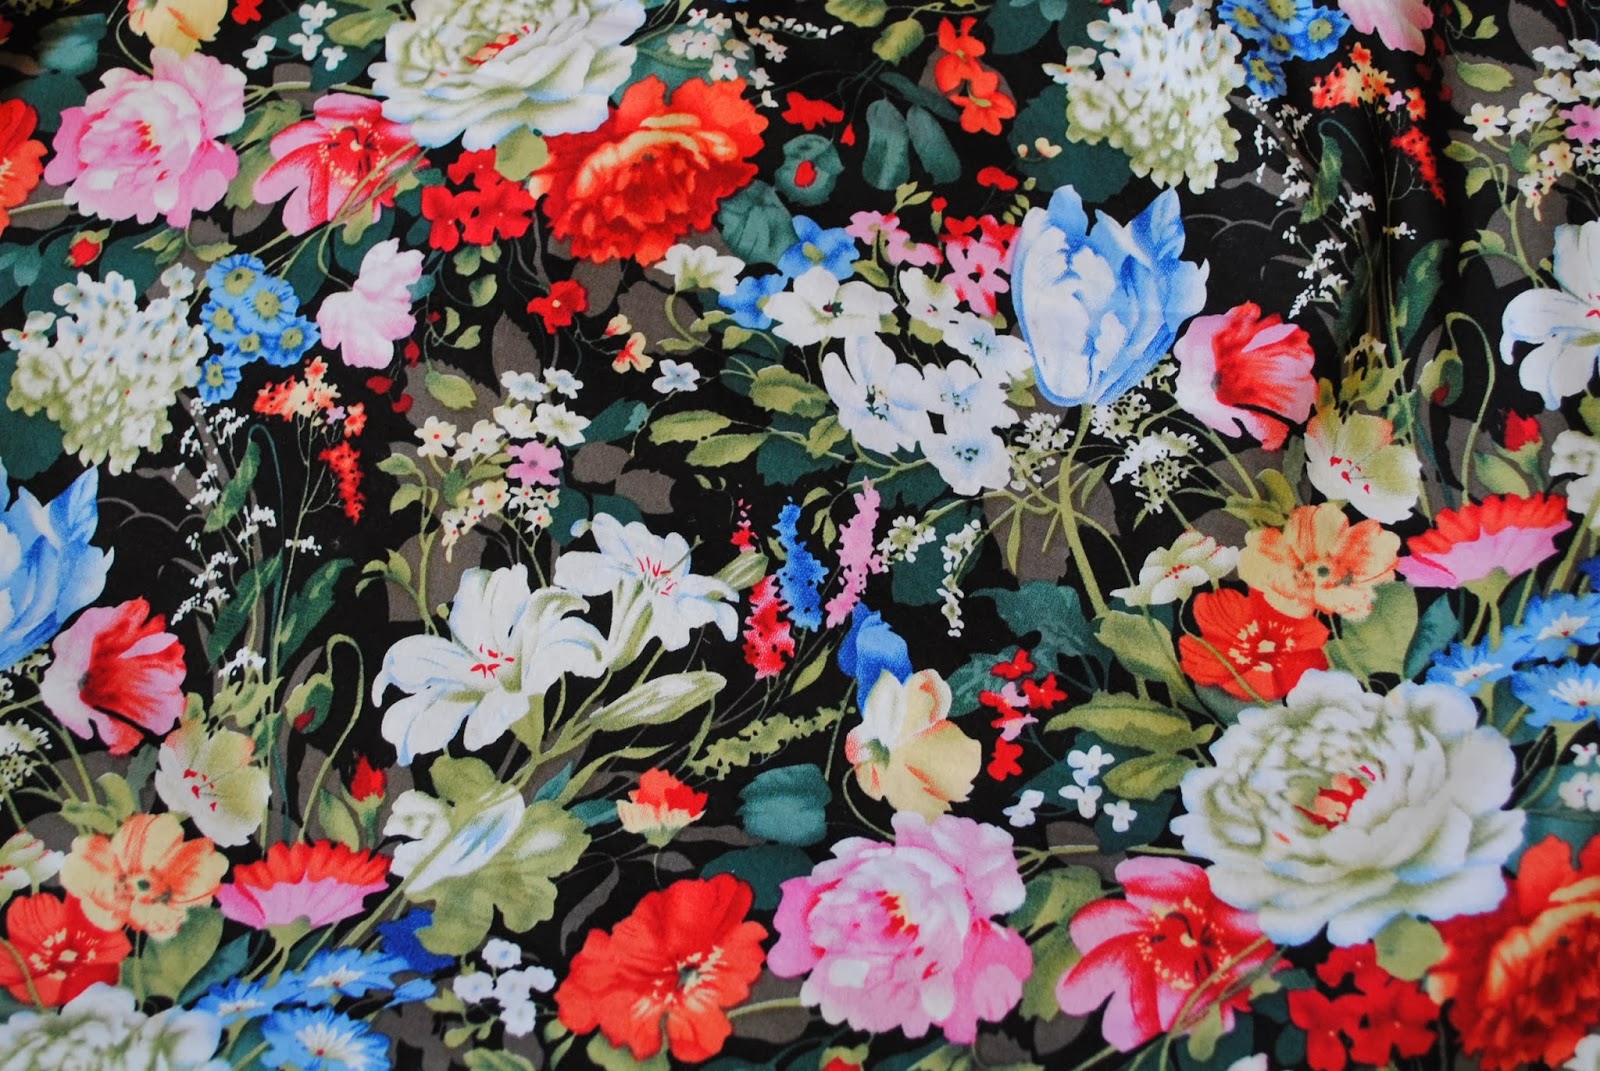
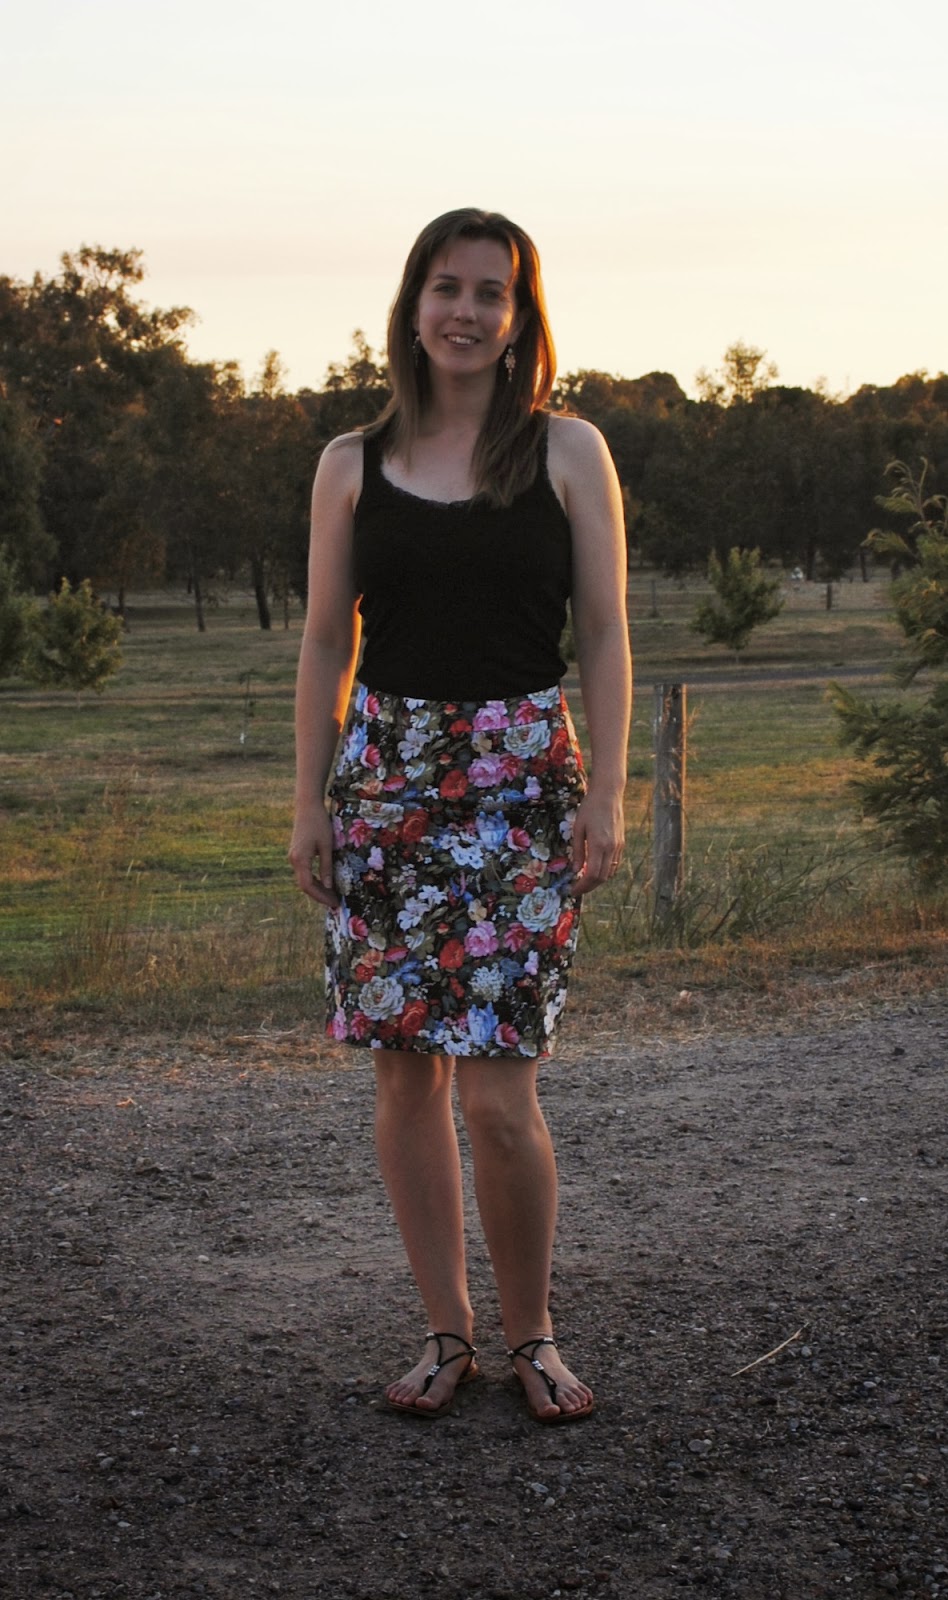
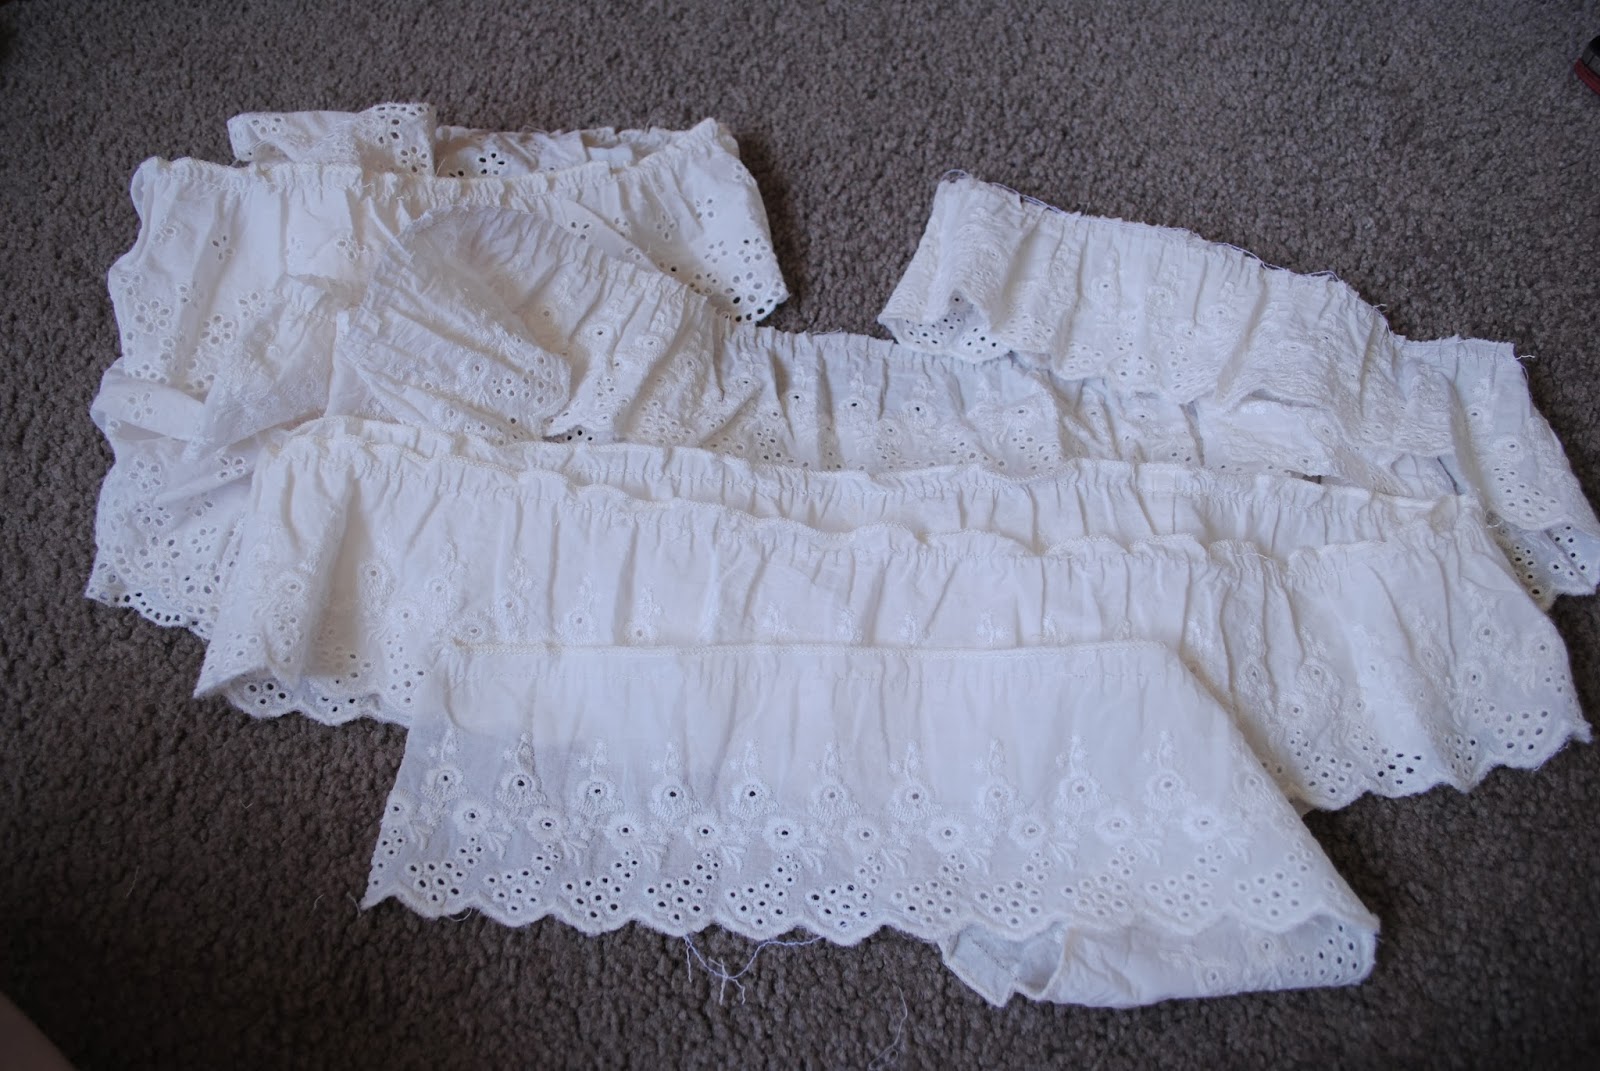
But I still had all of this left over:


Since I already had a metre of cream rayon in my stash drawer (intended a few months ago for a refashion using By Hand London's Polly top pattern, but it didn't cooperate...), I thought the two might combine nicely to make something a little bit textural.

For Christmas last year I was given a voucher for Style Arc patterns. (insert happy dance here). I decided on the Ziggi jacket, the Camilla blouse, and the Annie Cami:


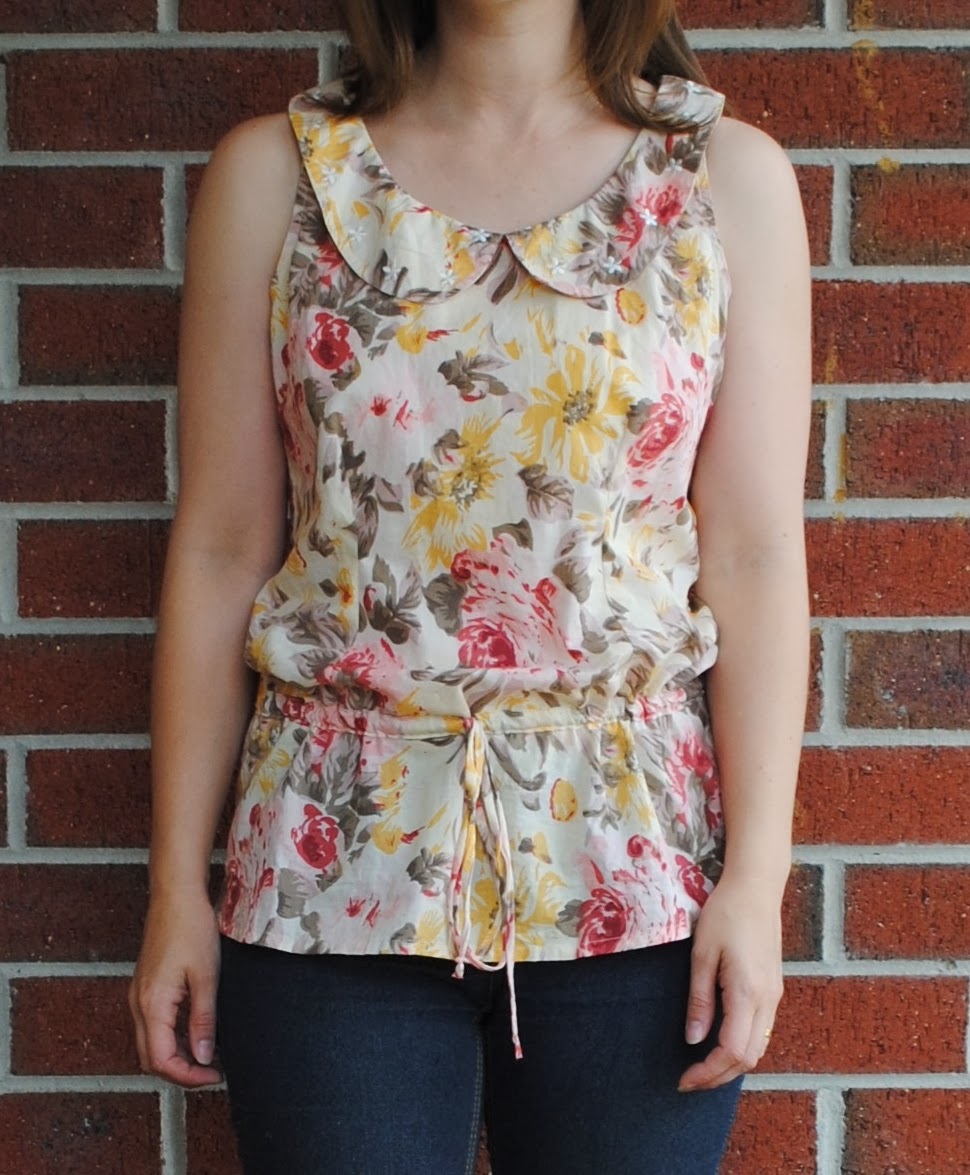
I remember reading on a blog somewhere - I want to say A Fashionable stitch, but I honestly don't recall - that it's a good idea to build up a stash of basic patterns that you can easily adapt or rework, rather than having hundreds of slightly different versions of essentially the same design. I thought this pattern for a woven tank fit the bill nicely.

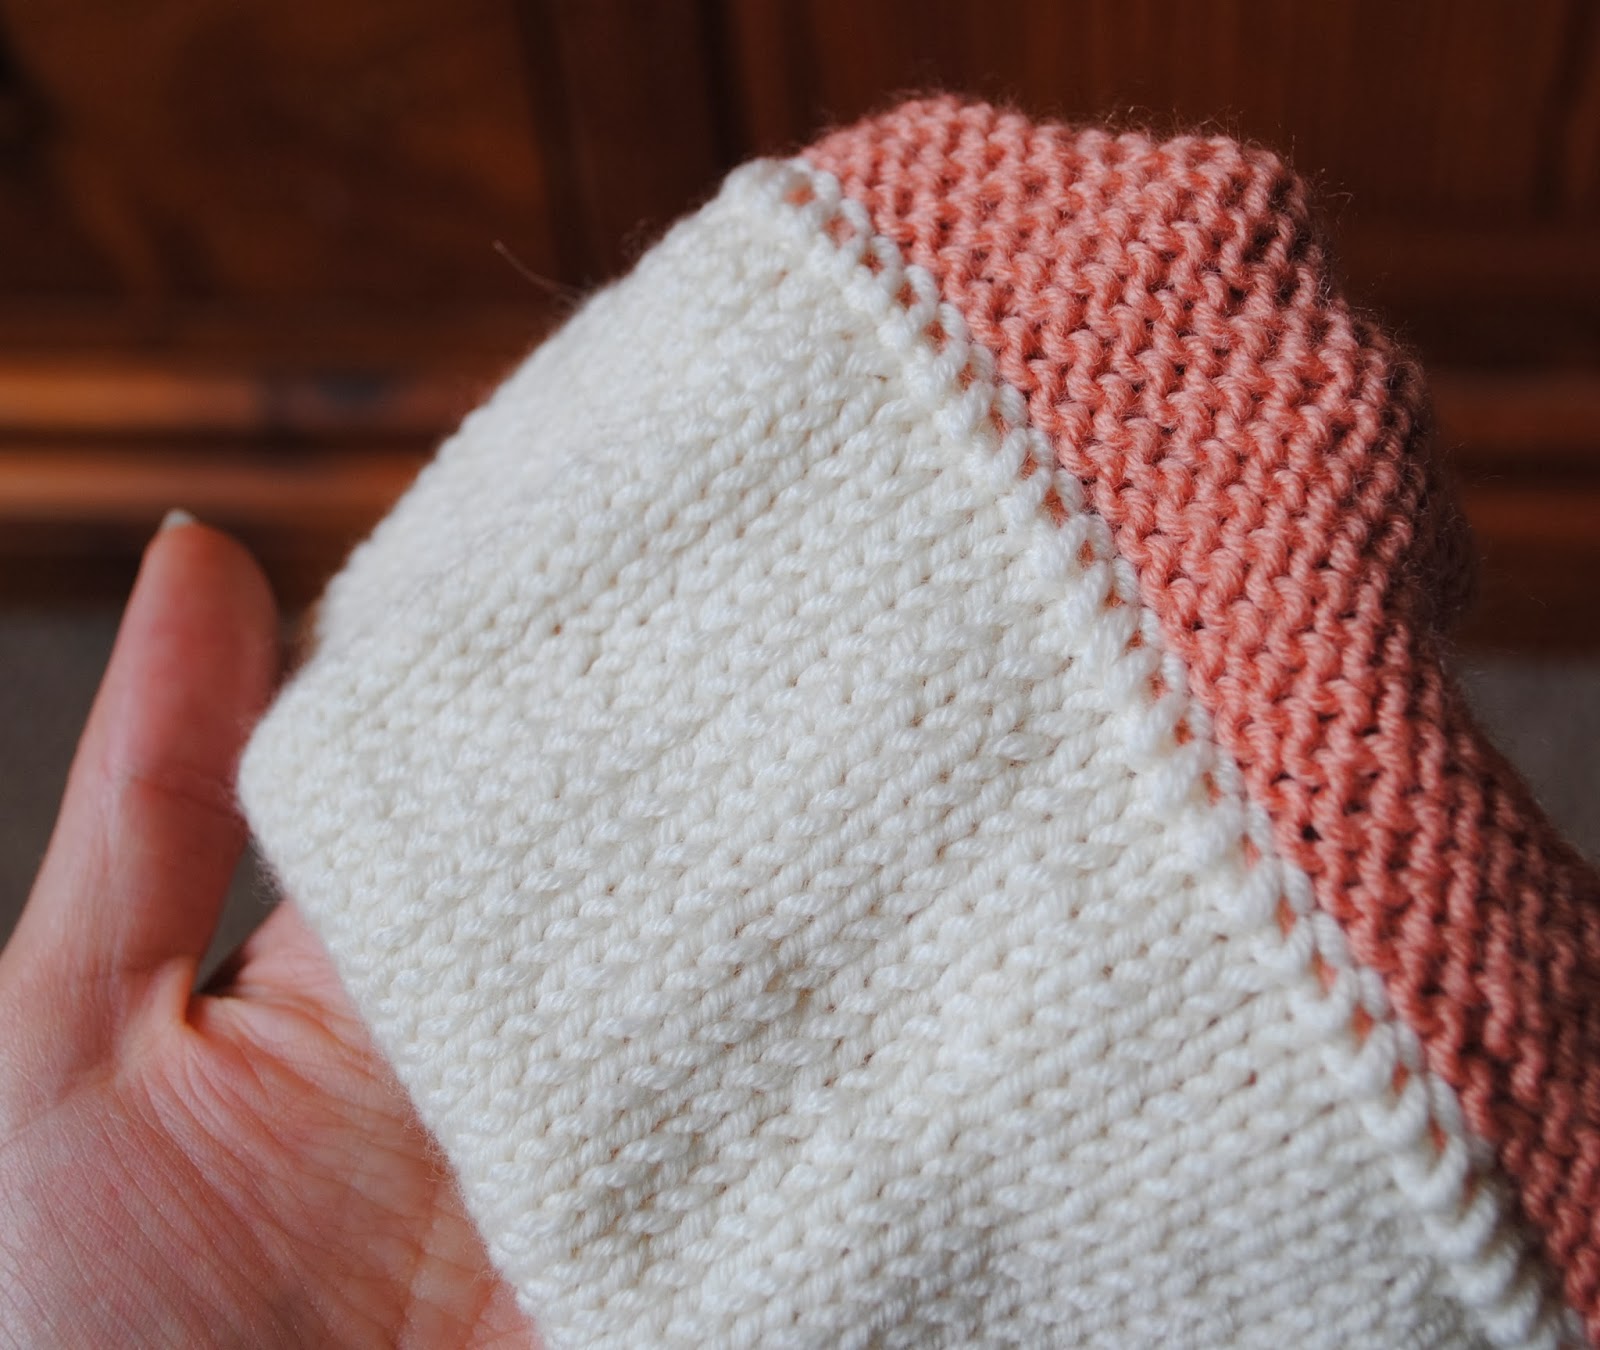
There was quite a lot of broderie anglais there, once I'd unpicked the gathering stitches and ironed it flat. I started by marking where the final hem would be on the front piece, and then laid a length of lace across it so that the scalloped edge just overlapped the hemline.


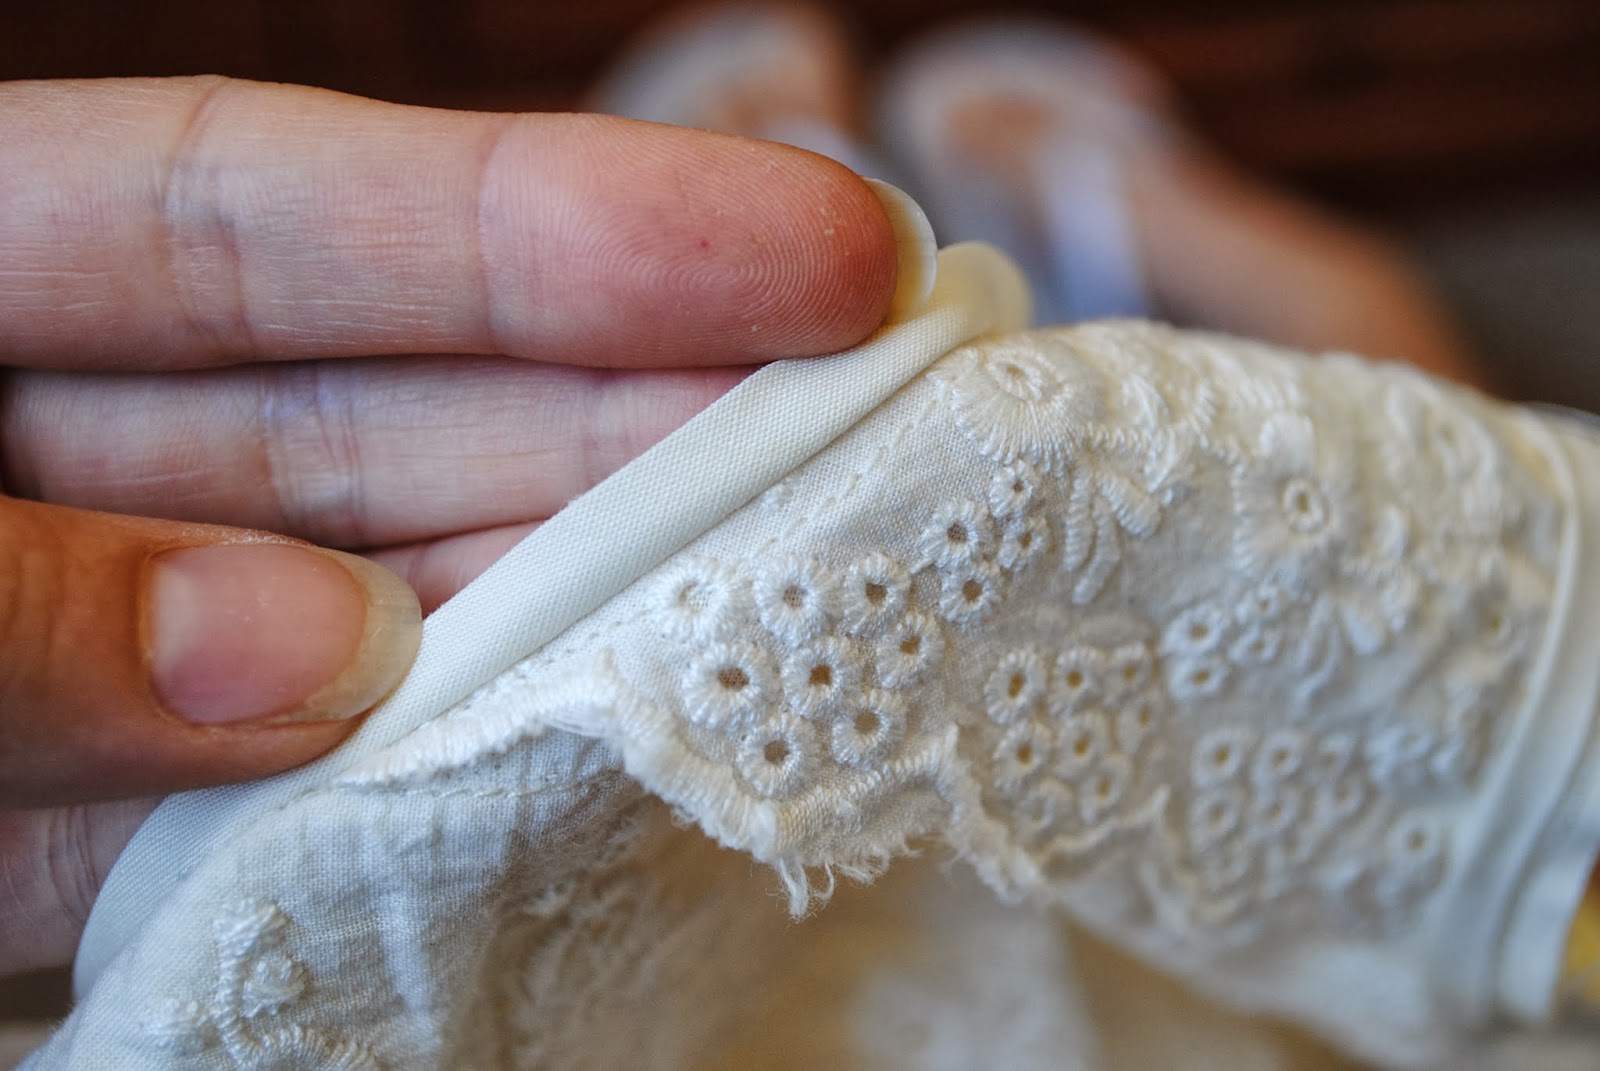
I sewed this down close to the upper edge of the lace, then positioned another length so that it just overlapped the top edge. I sewed this down the same way, then kept layering lace until it covered the front. From the back it looked like this:


I pinned around the edges, sewed close to the edge right around the sides, armholes and neckline and then cut away the excess:


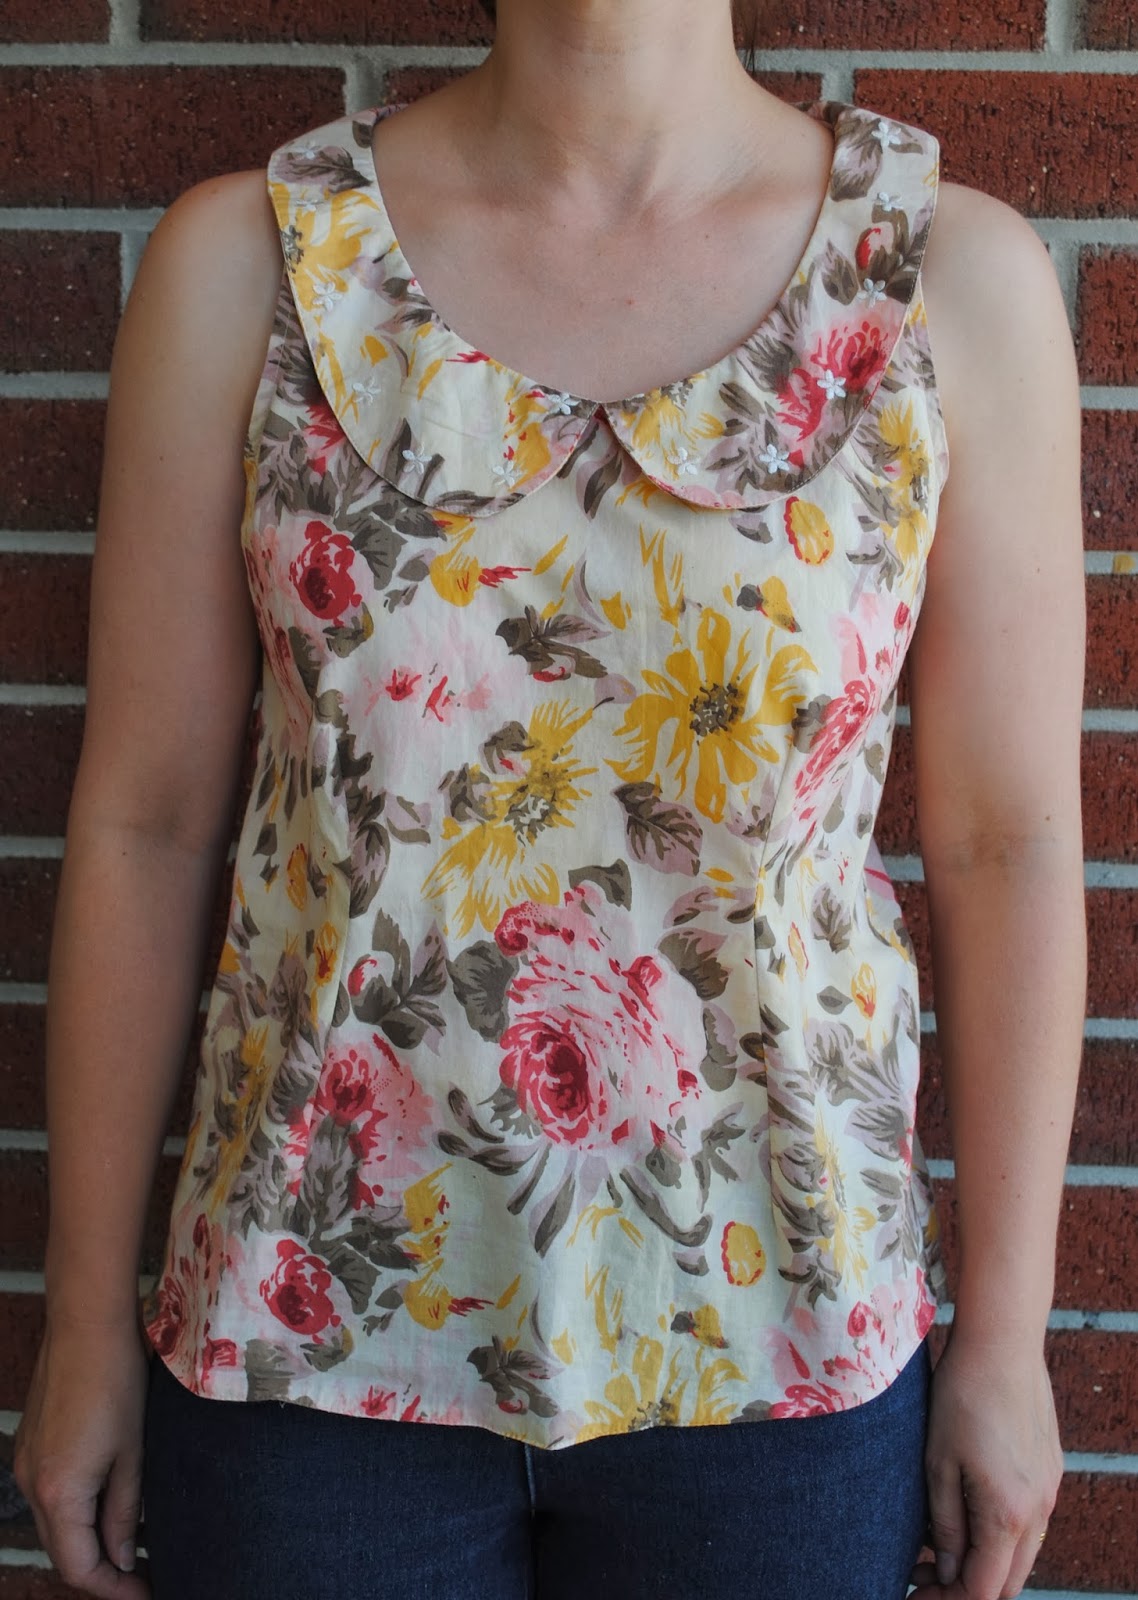
Then I sewed the rest as per instructions; front darts, sides, shoulders. Normally for this pattern I think I'd French seam, but here that would have been too bulky. I didn't have enough rayon over to make bias binding, so just used a polycotton pack that I had. Not lovely, but serviceable! I did find the line of securing stitching I did around the edges showed in places, so I had a little bit of unpicking to do there...


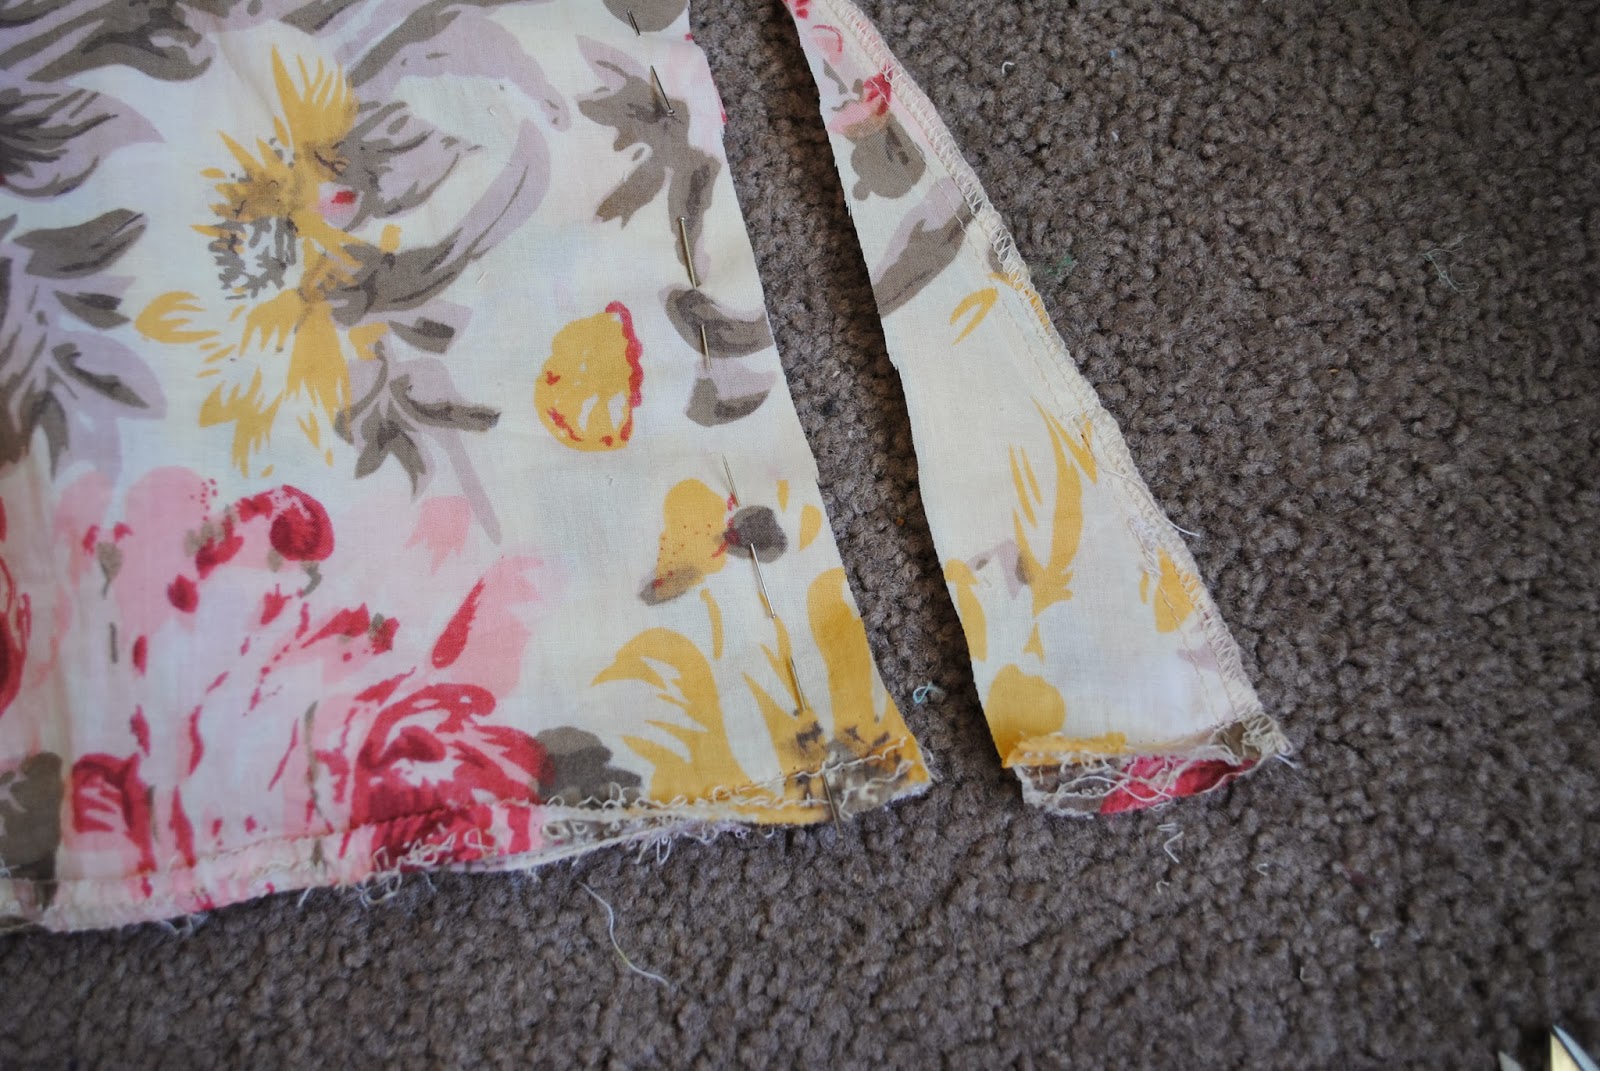
The pattern calls for the side vents to be mitred, which is quite a nice finish (although I'd like to try folding the edges under rather than overlocking next time). I could only do that on the back though;


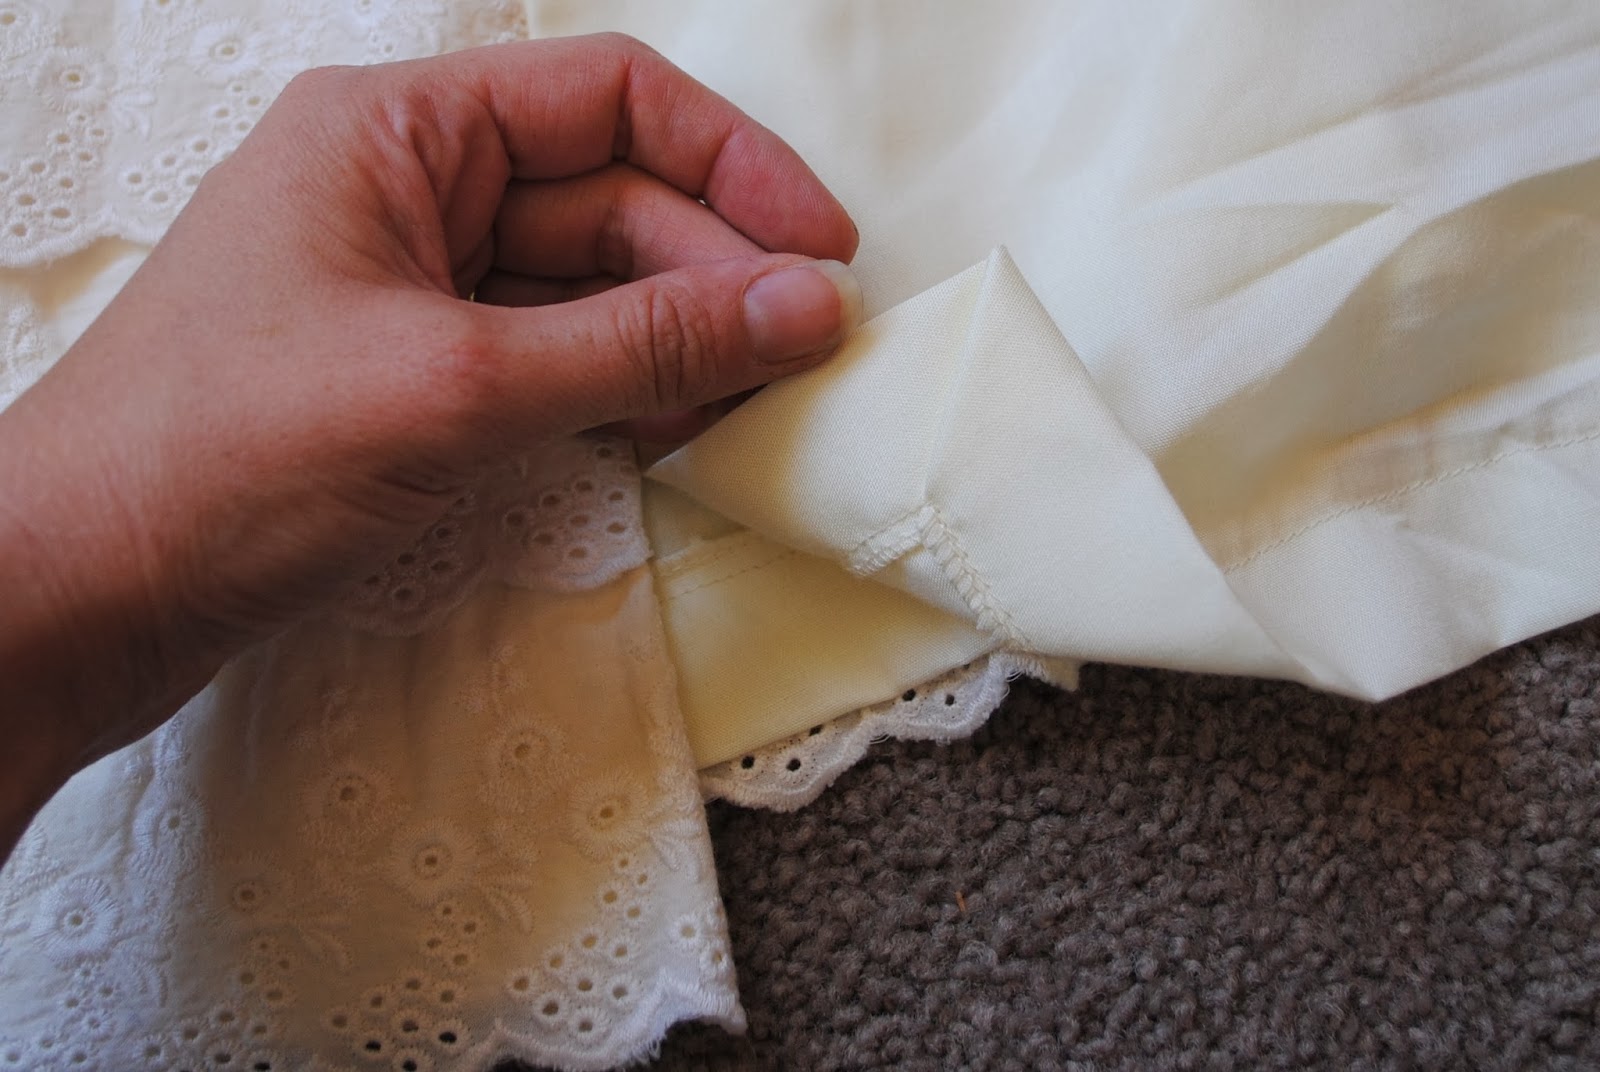
For the front, I sewed just the hem, not the vertical/side stitching. The lace was already secured to the main fabric at the outer edge of the side vent, so once folded back into the finished position it just needed a few hand stitches to secure it in place.


 I finished up with this:


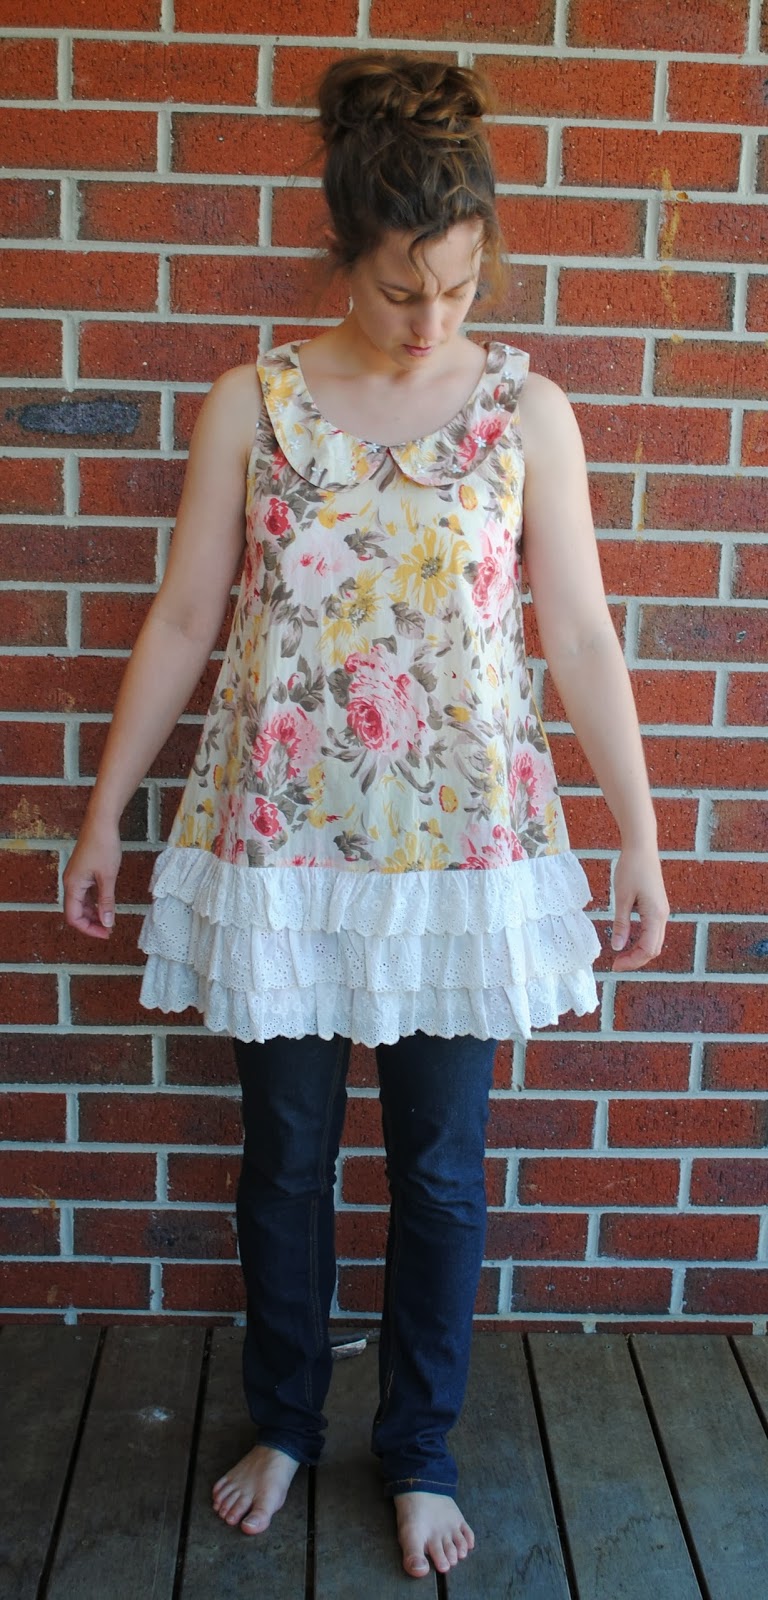
I'm quite pleased with it! Not too shabby for leftovers, anyhow :)  I don't know why the original lace ruffles made me irritated while these flat lace layers make me happy, but there you are!


It turned out a little boxier in shape than I expected or am used to wearing, but I'm ok with that I think. Since it only has a hook and eye closure at the back of the neck it has to be a loose enough fit so that you can actually get it on. Plus the lace makes it a bit stiffer than it would otherwise be. Next time I use this pattern I might nip in the side seams just a little bit. I think I'll also reshape the back opening to more of a keyhole shape and bind it, because the slit opening tends to sag a little.


 The other main construction change I'd make is to lower the darts. They really are a bit high (which we'll chalk up to nursing three kids...;) ) I think I can get away with it on this top, because the dart itself just catches the outer edge of a lace layer, and then that lace sits over the end of the seam, but I know it's not quite right.


This actually shows up a sewing weakness of mine - I almost always do a muslin, but sometimes it's a bit of a "token" muslin. For this one I really only checked that I could get it on and off... I'm not entirely sure, because the lace adds a fair bit of thickness, but I think it pulls a little across the bust. I've never had to do a FBA - never thought it would remotely be a possibility! - but I may research that for next time too.

This sounds like a bit of a catalogue of flaws so far, but it's really not so bad! It's had its first outing for the day and I was really happy with how it felt on. There's something so summery about broderie anglais, isn't there?

There was one other step I'd planned for this top, but stopped short on, thanks entirely to the Top 5 Reflections exercise. I'd intended to try dip-dyeing this to get an ombre effect (I was thinking coral or maybe aqua) but changed my mind. I realised that although the dye idea would - I think! - look good, it would actually limit how useful this top would be in my wardrobe. As it is it goes with lots of things, so I thought I'd forego a slightly more "impressive" blog post/item in favour of functionality. We're sewing a wardrobe here, after all!

In other news, the lovely Siri from Pinhouse Playmate has nominated me for another Liebster award! If you haven't come across her blog before, make sure you check it out - her sewing is amazing and her knitwear sublime :) Thanks Siri! I'll have a think over my answers and post soon :)

I've almost finished all my planned summer sewing now - just four more items to go :) I'm finding my mind starting to drift though to cooler weather projects, but that could just be the hankering for autumn that I get at this time every year - a kind of "if you build it, they will come" ;)

Do you sew according to a plan? Which do you prefer making - warm or cool weather garments?

Have a wonderful week :)

Danielle oxo

Friday, January 24, 2014

Refashion: Part 1 - Dress to Blouse

I realised the other day it's been aaages since I've done any refashioning, so here's the first refashion project of 2014. The best part was that in the end this dress yielded two garments. Win!


This was passed on to me by my sister, with the tags still on it. I was immediately struck by the lovely print and how beautifully it was made. I hadn't heard of the brand Ti Mo before so I looked it up. Here's an excerpt from the web site, regarding the founder Tine Mollatt:

For Tine truthfulness and honesty are also guiding beacons. She does not believe in exploitation of any kind to reach her goals. Not towards the people involved on the way, nor towards the animals that provide materials or towards mother earth. She believes in sustainability on all levels. She believes the time of mass consumption is soon to be past. She believes in high quality clothing that’s long lasting. She believes there is a right way to approach the calculation of costs, without cutting any corners. She believes in the value that lies within the garment and she believes in the masterful skill that lies in tailoring. 

I thought that was just wonderful, and it's an approach I really want to support. Unfortunately for me:


This is why I don't wear A-line or trapeze style dresses. 

There was plenty of potential though to make it more me-friendly. The three rows of broderie anglais ruffles are sewn to a "skirt" which was attached to the main body. The clever thing about those ruffles was that they gave the hemline enough body to stand out to create the A-line shape; while this doesn't work for me in this particular instance, I'm definitely filing it away in my head as a technique to remember.

My first thought was to make it into a simple blouse by removing the "skirt" (because I know I'll never wear a dress that short), and creating more shape through side shaping and front and back darts. The original dress had a button placket at the back, and I didn't want to change this. Nor did I want it to be so fitted that it required an additional closure. 

First things first: removal of skirt. You can see the A-line shaping pretty clearly here.


Next, I tried it on and marked where the front and back darts needed to be. I also marked where I wanted the sides to be.


After sewing these steps I tried it on. And, well, it was a bit blah...


The more I looked at it, the more I felt it was too "undecided" - too blousey to be a successful fitted top, and not blousey enough to be a proper blouse. Clearly more thought was needed...

Luckily, I still had the skirt. I unpicked all the lace and put that aside. From the bottom edge of the blouse I cut two 2cm strips and one 4cm strip. These were still large loops of fabric, so I cut them down one sewn side. The two 2cm strips I sewed together to make one long one. With a 0.5cm ( 1/4") seam allowance I sewed it into a cord and turned it in the right way. I always forget how long turning cords can take... I folded each edge of the wider strip under 1cm and pressed it flat. They ended up like this:


Then I  trimmed the same amount off the sides of the skirt that I had cut from the sides of the top. Actually, I think I cut all the excess from only one side. Then I sewed the skirt back to the top. Having marked the centre front, I sewed the pressed strip over the fabric join, folding the edges under, to form a casing. You can see where I'm going with this, I'm sure!


Once that was done I just needed to thread the long narrow cord through the casing and tie knots in the ends to keep them from fraying. Voila! A blouse I'm much happier with:


 No extra closures were needed, because it still slips over the head and shoulders easily. The front and back darts which weren't working in the first attempt give the blouse just the right amount of shaping here.  And I love that there was almost no fabric wastage - just the little I trimmed from the sides!


I saw an idea on Carolyn's blog that impressed me; she kept a notebook for a year detailing which handmade items she'd worn each day, so as to have an accurate overview of what actually got worn and how often. She actually drew beautiful "paper dolls" for this; it's a really lovely record! Now I know that if I decided to do something similar it would be a meticulously detailed record... for about one week. Then it would be shoved to the side and forgotten about till the next Top 5 Reflection Lists. But I thought I'd take a slightly more basic approach, because I love the idea. So blutacked to my sewing cupboard is a scrawled list of handmade items and a running tally. This blouse is outstripping the field by three to one already! It's proving to be really versatile - I've even worn it to work in 45 deg heat (that's 113 for farenheit people). I've got cardigans that go with it perfectly too, so I think it'll see me though autumns and springs very comfortably too. I'm really thrilled with this one. :)

Next time, Part 2 of the refashion. After all, I still have all this broderie anglais.... It's the dress that keeps on giving!


What's on your sewing table at the moment?

Have a wonderful week :)

Danielle 

Friday, January 17, 2014

Complete: Homage Skirt

...Because "homage" sounds much nicer than "ripoff" ;)

I'd planned to write this post earlier this week, but it's been an unusual few days. As any Australian readers will know all too well, we've been sweltering through the hottest stretch of weather since 1908- that's the Victorian statistic anyway. And in Australia, that typically means bushfires. We didn't quite get to the point of evacuation, but friends just 3km away did. As it was, the car was packed with bare essentials ready to go at any point. Five separate "incidents" - official term - within 20km of home is pretty spooky for a most-of-her-life-suburbanite! In any case, blogging kind of slipped down the list of priorities....

But it was kind of enlightening, looking at the sparsely packed car, to realise how few material things in life are genuine essentials. Evidently my decluttering journey still has some way to go.

But, on to sewing. This is actually my last make of last year; I wanted something new to wear on Christmas Day. And ever since I saw Sarah of Fabric Tragic's Monet on Acid Charlotte Skirt I've really wanted something similar of my own - a bright floral with a design solid enough to look great as a summer or winter skirt. A trip to Rathdowne Remnants yielded me just the thing; a cheerful (slight) stretch cotton, bright florals on a black background. (I was meant to be helping to look for bridesmaid fabric, but the bride didn't mind me diverting for just a moment.)


Now I do have Charlotte Skirt pattern, and have used it, but I decided to go with New Look 6107, which I used just recently for my sequin skirt. (Which, by the way, has already has several outings. I love it more every time I wear it, and I can't believe I forgot to include it in my official Top 5). I like the lower waist band on this pattern for a more casual skirt, plus it's easier to walk in than the Charlotte. Also, using a different pattern made me feel a little less mindlessly imitative!


I wore it Christmas Day with my white Rowe top tucked in - which was actually my first Me Made Outfit. (I'm not sure if you can call a dress an outfit, can you??) It felt good - I can make coordinating items!!

I made it up exactly as I did the sequin skirt, with the same sizing and (minor) modifications. I have noticed though that this skirt, if I've been sitting down for any stretch of time, tends to get that horizontal fold in front. (You can see that in the front photo above) I'm not sure whether that's because it needed to be graded a little larger at the hips, or if it's just creases from wear. I think it's the latter; my sequin one certainly doesn't do that, and that fabric (plus underlining) is a good deal thicker. Although it may have a bit more stretch to it...Funny how different fabrics behave differently.

I did underline the skirt with a black voile, because I wanted to make sure the fabric was sturdy enough for the skirt style (and didn't create a VPL). On reflection though, I probably negated the stretch by doing so. I've worn it a couple of times since Christmas, and the fold really only happens after a few hours of wear. To be honest, it doesn't bother me too much anyway. Just something to note for next time :)


I did taper the back seam down to 2cm in from the seam allowance at the hem, like I did previously. I prefer the line that gives the skirt - it's just that little bit more shapely. But it still allows for things like, er, walking freely...


The one genuine regret I have is that I used the voile as the waistband lining/facing. I think that I was overcompensating for the thickness of the sequin one's waistband. But this one could have done with being a wee bit firmer, plus the voile is a little too transparent for that particular ask. Am I regretful enough to redo it? Not so much, no.


On the whole, I'm really happy with this, and it ticks the boxes for being a practical, wearable, versatile make. Nice to finish the year on a good note!

Finally, thank you to all of you who expressed interest in my fabric/yarn giveaway. the winners, as drawn by my man are:

Mika of Savoury Stitches  -  the Japanese lawn.
Gillian of Crafting a Rainbow  -  the navy gingham
Sarah of Fabric Tragic   -  The Abuelita yarn

Congratulations, and may your makes be satisfying and enviable! If you could email your address to me at daniellekrivan@gmail.com I'll get those parcels winging their way to you all ASAP.

Have a wonderful week :)

Danielle oxo

Tuesday, January 7, 2014

Talking Gifts...

Not Christmas gifts - unlike many of you inspirational people out there I didn't make a single Christmas present in 2013. No, these are all December / very late November birthday and birth gifts. And they were a nice way to relax during an extremely busy month!

I haven't had a chance to give most of these out yet, but I'll assume that my nephew and nieces aren't reading this... First up, my version of Eva's Hat by Mary Ann Stephens in Debbie Bliss Baby Cashmerino. My experience of DB patterns has been a bit mixed, but the yarn itself is glorious!


This is knitted in the round from the bottom up, and then stitches are picked up at the hem to knit a contrast band for the inside, which is then sewn down. This helps the hem to sit flat rather than curling up and hides the strands of the colourwork on the inside. Plus it amps up the cozy factor!


This was my first experience in colourwork (other than stripes, that is) and I loved it. I've been wandering around Pinterest and Ravelry and have a few plans for me.... More on that another time though.


Next up, another Hermione Loves Ron in stashed Rowan Bamboo Soft. I've written about this in a previous version here. Love this pattern. My daughter's hoping there's enough stash left for one more...


Slightly more challenging - finding a hat for a fourteen year old boy. Enter Graham, a slouchy beanie in broken rib. It looks a bit odd lying flat - no hanger appeal there - so I got my boy to try it on for the camera.


It got a thumbs up from him and my twelve-nearly-thirteen year old girl, so I figure I'm on the right track :) Good pattern - AND (drumroll, please) I knit a gauge swatch! Giant leap forward in personal growth, that. I used Cleckheaton Country Naturals (8 ply/DK instead of 10 ply/worsted, so gauge test was unavoidable), which is pretty much my go-to yarn for male knits.

Our friends had a gorgeous baby boy on Christmas Day, so I dug out my Old Faithful Sirdar children's knits pattern book and made my favourite basic V neck. The neck looks small here, I know, but it stretches over a grapefruit with room to spare. (Don't ask.) This was in Bendigo Classic 8 ply, and was actually from stash. Woo hoo!


My brother-in-law- and his partner had a baby boy in late November, and since they live in Darwin there didn't seem to be much point in knitting anything! I hadn't done any quilting for years, and even then it was pretty basic, so I kept this simple too.


The batting (is that what it's called??) is a cotton, so it's really lightweight and breathes nicely. Plus it's not bulky at all, which is a plus since they travel around a lot. It'll probably be more use as a playmat, but it's a good size for that. It's all machine done except for the bound edges at the back. I don't remember ever machine quilting before, and I'm glad this was relatively thin, because it got tricky in the middle there. A few lines show up some uneven stitch lengths, but I'm pretty sure only a proper quilter would notice that. I got a look from my husband when I asked him, so I'll take that as a yes!


It took a bit longer than I thought it would (blind optimism fails me yet again...) but I enjoyed it. I'm not ready to become a regular quilter any time soon - although I'd like someday to make one for our bed - but it made for a nice change. Thank goodness for rotary cutters, though!

I don't often share much outside sewing/knitting ventures, but I hope you don't mind me being a wee bit self-indulgent for a moment and sharing The Best Christmas Present Ever:


Introducing Sasha. We're all in love...

This first post of the year is also my first blogiversary! I thought I'd commemorate it first by saying an enormous and heartfelt thank you to you all. It's been such a rewarding year, and I've loved being part of this amazing online community. Thank you for all your lovely comments, support and encouragement; it's been so appreciated!

I've been going through my small stash as I've been planning projects for this year, and found a few items that, while I still love them, just don't fit in with the plans. So I wondered whether any of these could find a willing home among any of you? A slightly more tangible thank you, perhaps!

Firstly, a Japanese cotton lawn. This is 112cm (44") wide, and 3 metres (ummm...120" - I don't know yards!) long. It's a navy nackground, with a teal-green, lemon and cream print.


Secondly, a cotton (I'm pretty sure) navy gingham, with 2.5cm / 1" squares. This is 118cm /48" wide and there's just over 2 metres in length.


Thirdly, three skeins of Abuelita Baby Merino Lace yarn. Each skein is 420 yards / 384 metres. This, I'm assured, is fingering weight (4 ply) merino not lace weight despite the name. It's beautifully soft, and I was utterly seduced by it when I saw it on sale 2 years ago - so much so that I ignored the fact that I just don't wear this colour.... Your gain, perhaps!


If any of these take your fancy, leave a comment saying which one(s) and your email address so I can contact you. If there's additional interest I'll draw names out of a hat. Or maybe I'll get Sasha to... ;)

Finally, not as a giveaway, but just because I love it and wanted to Show and Tell - look what my sister gave me for Christmas - the most wonderful tape measure I've ever seen! On the back are these fantastic little drawings of the predominant fashion silhouette decade by decade from 1700 to 1990. It's almost too good to use!


Have a wonderful week :)

Danielle oxo